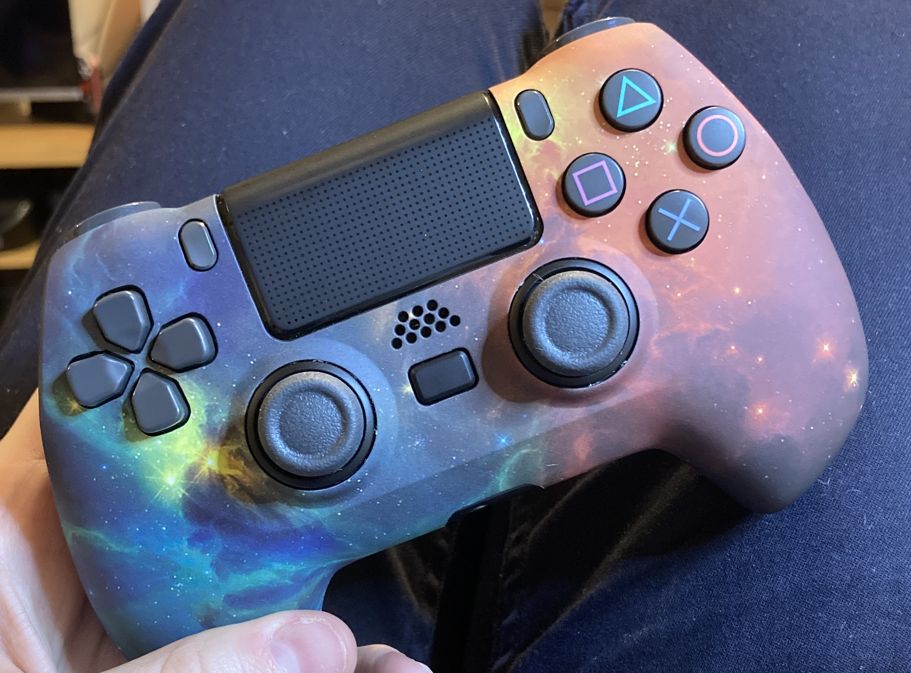
Custom DualShock 4
Ok, so this project was very self indulgent, but hear me out. I wanted a new controller because I was having complaints about the ergonomics of my 8bitdo Pro 2 (I wanted smaller face buttons so that I could more easily press multiple at the same time) and so I launched into a month long research binge into the options for video game controllers in 2024. I’ll spare you the details, but for multiple reasons I decided that the best solution would be to take my existing dualshock and add on some “pro” level features such as trigger stops and back buttons.
Fixing up my old controller
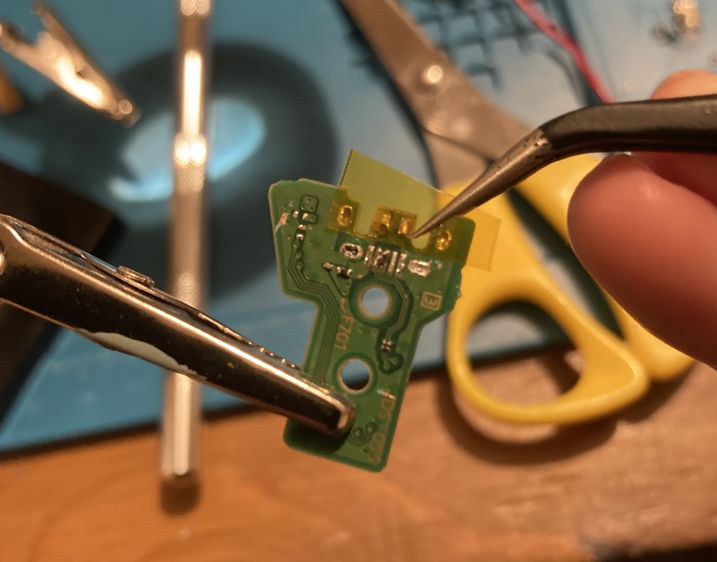
So, my old dualshock was a lovely controller but it had developed a bit of analogue drift. I, being very aware of the problem with e-waste and also the owner of a soldering iron, decided that instead of buying a fresh controller I would simply replace the drifting potentiometers.
Well, I watched many desoldering tutorials, some specifically for the process of fixing controllers. I had the equipment. I had a steady hand.
I fucked it up.
Seriously, I don’t know what it was, but I could not get the solder to liquidise satisfactorily. Don’t get me wrong, I got the old pots out and the new ones in, but only after seriously cooking the board. The controller still kind of works, but the sticks now jitter something fierce.
If I want to desolder stuff in future, I will definitely purchase a heat gun.
Putting a new controller into a different shell
The core of this customisation effort is the Extremerate Decade Tournament controller shell, which adds 4 back buttons and physical trigger stops to a stock dualshock 4. I have previously replaced the shells on my Switch Joycons using an Extremerate shell, so I was confident about the quality of their products.
(As an aside, replacing Joycon analogue sticks just involves some screws and ribbon cables. If only real controllers made it that easy!)
Improving the Decade Tournament trigger stops
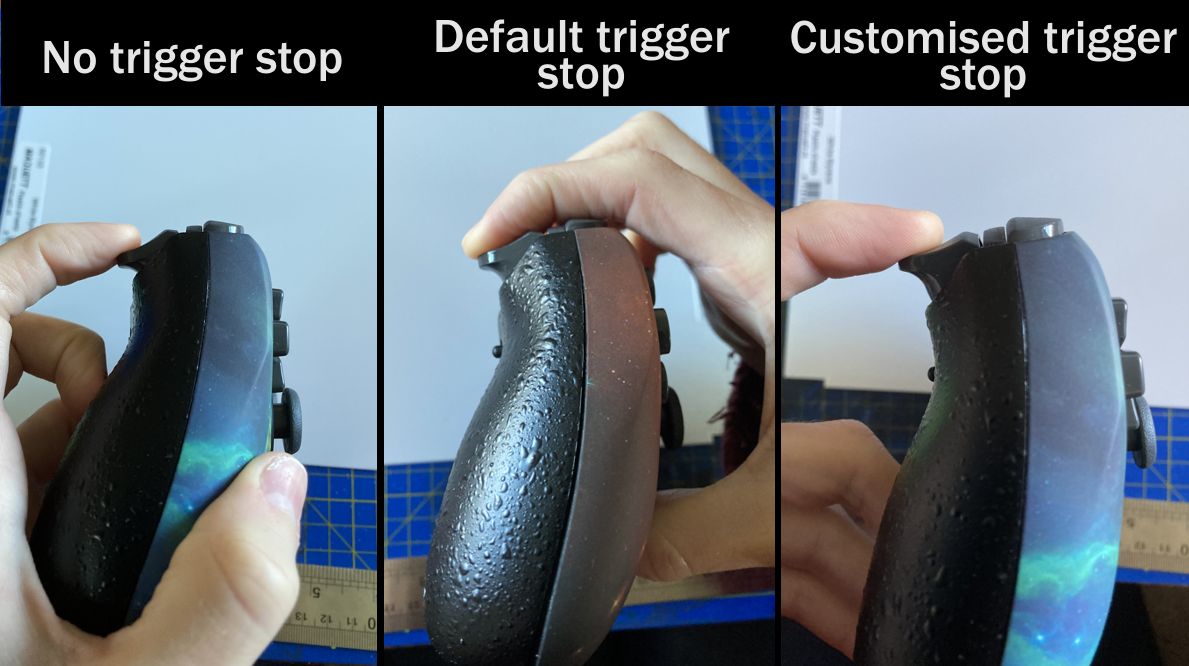
I really like the digital triggers on a Switch Pro controller, and I was obsessed with getting a controller with optional trigger stops so that I could have that experience on my main pad. Alas, the Decade Tounament kit has trigger stops that cut out around 40% of the total travel, which just wasn’t enough for me.
Would I take this lying down? Hell no! I figured out how the trigger stops worked and then busted out the pla-plate and cement (thank you, modelling hobby)!
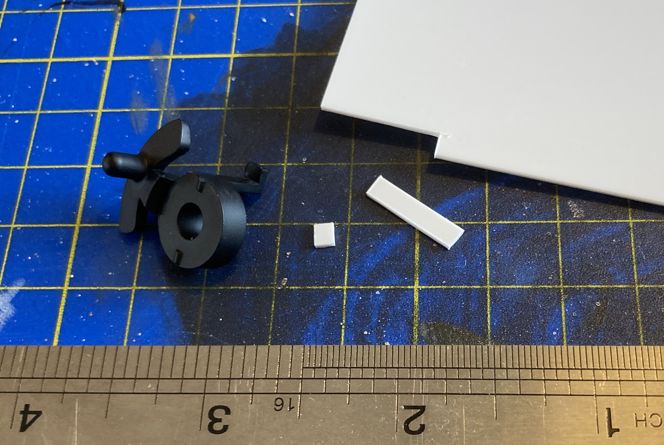

I experimented with a few different thicknesses of lip-offset, eventually settling on 3 layers of 0.75mm plate. It’s probably not exactly a 2.25mm offset when you factor in the melting effect of the plastic cement and my sanding efforts, but I am sure it’s close enough.
All in all, I’ve managed to increase the travel reduction from around 40% to around 90%! I do have to do some software tricks to get the 10% actutation to be treated as a full pull, but that’s a small price to pay in my eyes.
USB-C
Hey, you know what sucks? Micro USB.
What does a dualshock 4 come with? Micro USB.
Damn.
It’s 2024, I couldn’t go back to micro USB. I needed to do an upgrade. Initially, I had intended to use a USB-C breakout board and some fancy soldering to create a quick and dirty hack-job, but unfortunately I didn’t have thin enough wires to hook up my stripped power PCB and I was having a lot of trouble of tinning the tiny contacts anyway.
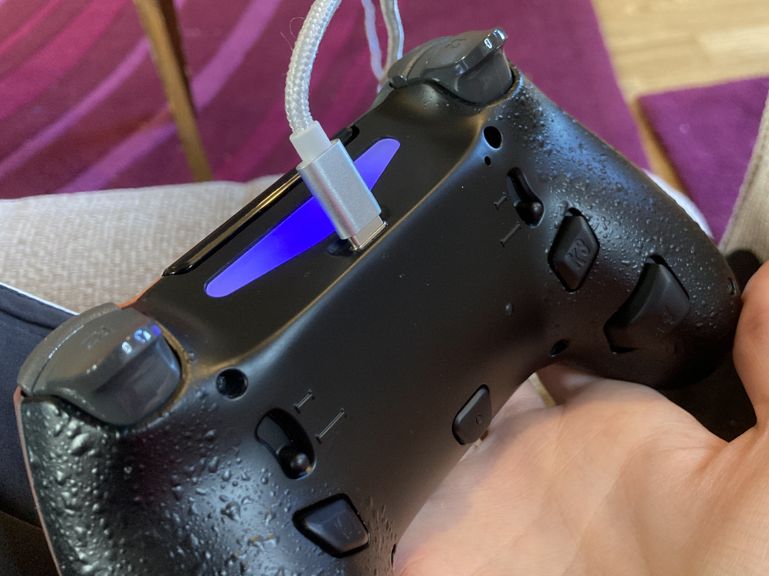
As luck would have it, just as I gave up in frustration, Marius Heier’s drop-in USB-C PCB came back into stock. I snapped up a board and patiently waited for it to arrive.
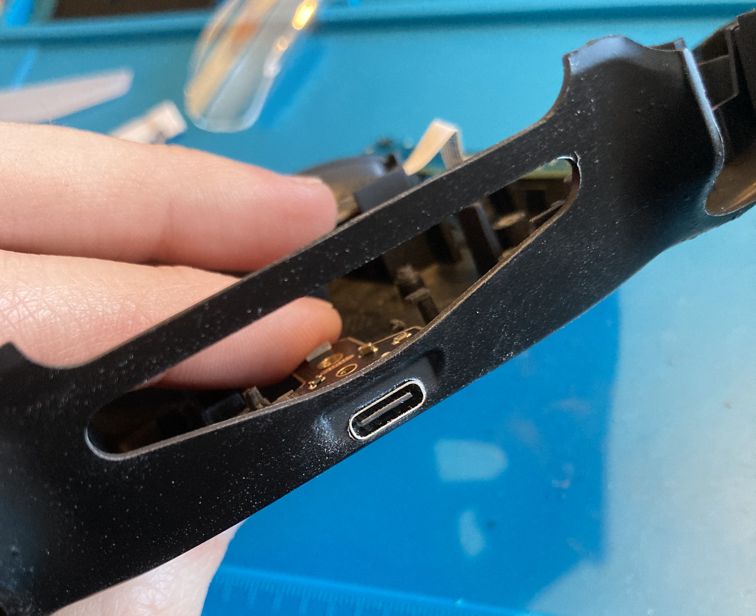
In the meantime, I needed to prepare the Decade Tournament shell for USB-C. A USB-C port is slightly larger than the equivalent micro USB port, so I needed to do some filing. I own a rotary tool, and it turned out that one of the cylindrical files that it came with was just the right size for USB-C, so that’s what I used - though I did all the sanding by hand because my rotary tool doesn’t have a low enough speed setting.

Conclusion
First of all, I would like to announce that I love my new controller. The ergonomics of the Decade Tournament kit are perfect for my hands, and my modifications work really well.
That said, it’s not perfect: the Decade Tournament shell sits lower on the front of the controller and as a result, the face buttons and D-pad stick out just a little bit more than they would normally. This tiny bit of extra clearance leaves the buttons feeling a bit more wobbly and therefore unresponsive than on a vanilla controller.
I am also aware that I tried multiple times to do some proper electronics customisation, only to mess it up and revert to an off-the-shelf solution. I really want to perform some successful desoldering in the future, and I think I’ll keep practicing on my cooked controller until I’ve got the process down.
Just you wait, my next controller will be even more cyberpunk!